Introduction
A handcrafted wooden jewelry box is not only a functional storage solution but also a beautiful piece of art that can be treasured for generations. Making your own jewelry box allows you to customize the design, choose the wood, and create a unique heirloom that reflects your craftsmanship and creativity.
In this comprehensive guide, we will take you through the process of making a wooden jewelry box from start to finish. Whether you are a seasoned woodworker or a beginner eager to embark on your first woodworking project, follow these step-by-step instructions to create a stunning jewelry box that will be cherished for years to come.
Table of Contents:
- Materials and Tools
- Designing Your Jewelry Box
- Cutting and Preparing the Wood
- Joinery Techniques for a Sturdy Box
- Assembling the Box
- Creating the Lid and Hinges
- Adding Compartments and Lining
- Sanding and Finishing
- Personalization and Final Touches
- Maintenance and Care
- Conclusion
- Materials and Tools
- Gather all the necessary materials and tools before starting your project. For this jewelry box, you will need:
Materials:
- Hardwood of your choice (e.g., oak, walnut, cherry)
- Plywood or solid wood for the base
- Wood glue
- Sandpaper (varying grits)
- Flocking or velvet fabric for lining
Tools:
- Table saw or circular saw
- Miter saw or miter box
- Router with various bits
- Clamps
- Hammer and nails or brad nailer
- Chisels
- Measuring tools (tape measure, square, and compass)
- Safety gear (safety glasses, dust mask, and ear protection)
Designing Your Jewelry Box
Before diving into the woodworking process, plan and design your jewelry box. Consider the dimensions, compartments, and any decorative elements you want to incorporate. Sketch your design on paper or use design software to visualize the final product. This step is crucial as it allows you to refine your ideas and avoid potential mistakes during construction.
Cutting and Preparing the Wood
Once you have your design, carefully measure and mark the wood pieces according to the dimensions. Use a table saw or circular saw to make precise cuts. Ensure that all pieces fit together snugly before moving on to the next step.
Joinery Techniques for a Sturdy Box
For a durable jewelry box, employ strong joinery techniques. Options include dovetail joints for the corners, rabbet joints for the sides, and a dado joint for the base. Take your time to create precise and accurate joints, as they will determine the box’s structural integrity.
Assembling the Box
Assemble the box using wood glue and clamps. Apply a thin, even layer of wood glue to the joints before securing them together. Use clamps to hold the pieces firmly in place until the glue dries. Wipe off any excess glue immediately with a damp cloth.
Creating the Lid and Hinges
Design and construct the lid for your jewelry box. Depending on your preference, you can use a simple lift-off lid or create a hinged lid with decorative brass or wooden hinges. Hinges add functionality and a touch of elegance to your jewelry box.
Adding Compartments and Lining
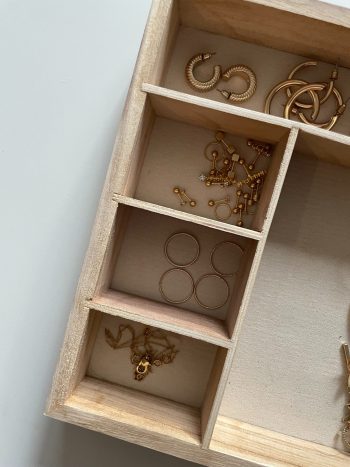
To organize your jewelry, consider adding compartments inside the box. Use a router to create grooves for dividers or install small wooden trays. Additionally, line the interior of the box with flocking or velvet fabric to protect and showcase your jewelry.
Sanding and Finishing
Sand the entire jewelry box with varying grits of sandpaper to achieve a smooth and polished surface. Pay special attention to edges and corners to ensure a professional finish. Once sanded, choose a suitable finish for your wood, such as stain, lacquer, or varnish, to enhance the wood’s natural beauty and protect it from wear.
Personalization and Final Touches
Add personal touches to your jewelry box by carving intricate patterns, inlaying contrasting wood, or applying woodburning designs. You can also attach a small, personalized nameplate to give it a unique identity. These details make your jewelry box even more special and one-of-a-kind.
Maintenance and Care
To keep your jewelry box looking its best, regularly dust it with a soft, lint-free cloth. Avoid placing it in direct sunlight or near heat sources to prevent warping or fading. If needed, reapply finish or touch up any scratches to maintain its pristine appearance.
Conclusion
Crafting a wooden jewelry box is a rewarding woodworking project that allows you to showcase your creativity and woodworking skills. By following this step-by-step guide, you can create a stunning and functional jewelry box that will become a cherished heirloom for years to come. Remember to take your time, pay attention to detail, and enjoy the process of bringing your vision to life. Happy woodworking!
Our website is supported by our users. We sometimes earn affiliate commissions when you click through the affiliate links on our website.

